👥运行你自己的验证器
Last updated
Last updated
使用 ChainUp Cloud 作为验证器服务提供商来设置以太坊验证器的简短指南。如果您只是想质押 Eth,建议您查看以太坊质押指南 Ethereum Staking Guide。
a. A compatible wallet (currently only supports Metamask) that holds more than 32 Eth
b. Generate Validator Keys (keystore_timestamp.json), which can be done through the Ethereum launchpad (Mainnet, Goerli) and the deposit-cli tool.
c. Deposit 32 Eth (with your deposit_data-timestamp.json) either through the Abyss Eth2 Depositer (which currently supports only Mainnet and Goerli) or Ethereum launchpad (Mainnet, Goerli).
The following video walkthrough covers prerequisites b and c.
Step 1: Users are able to sign up on ChainUp Cloud.
Step 2: Login to ChainUp Cloud with your newly created account.
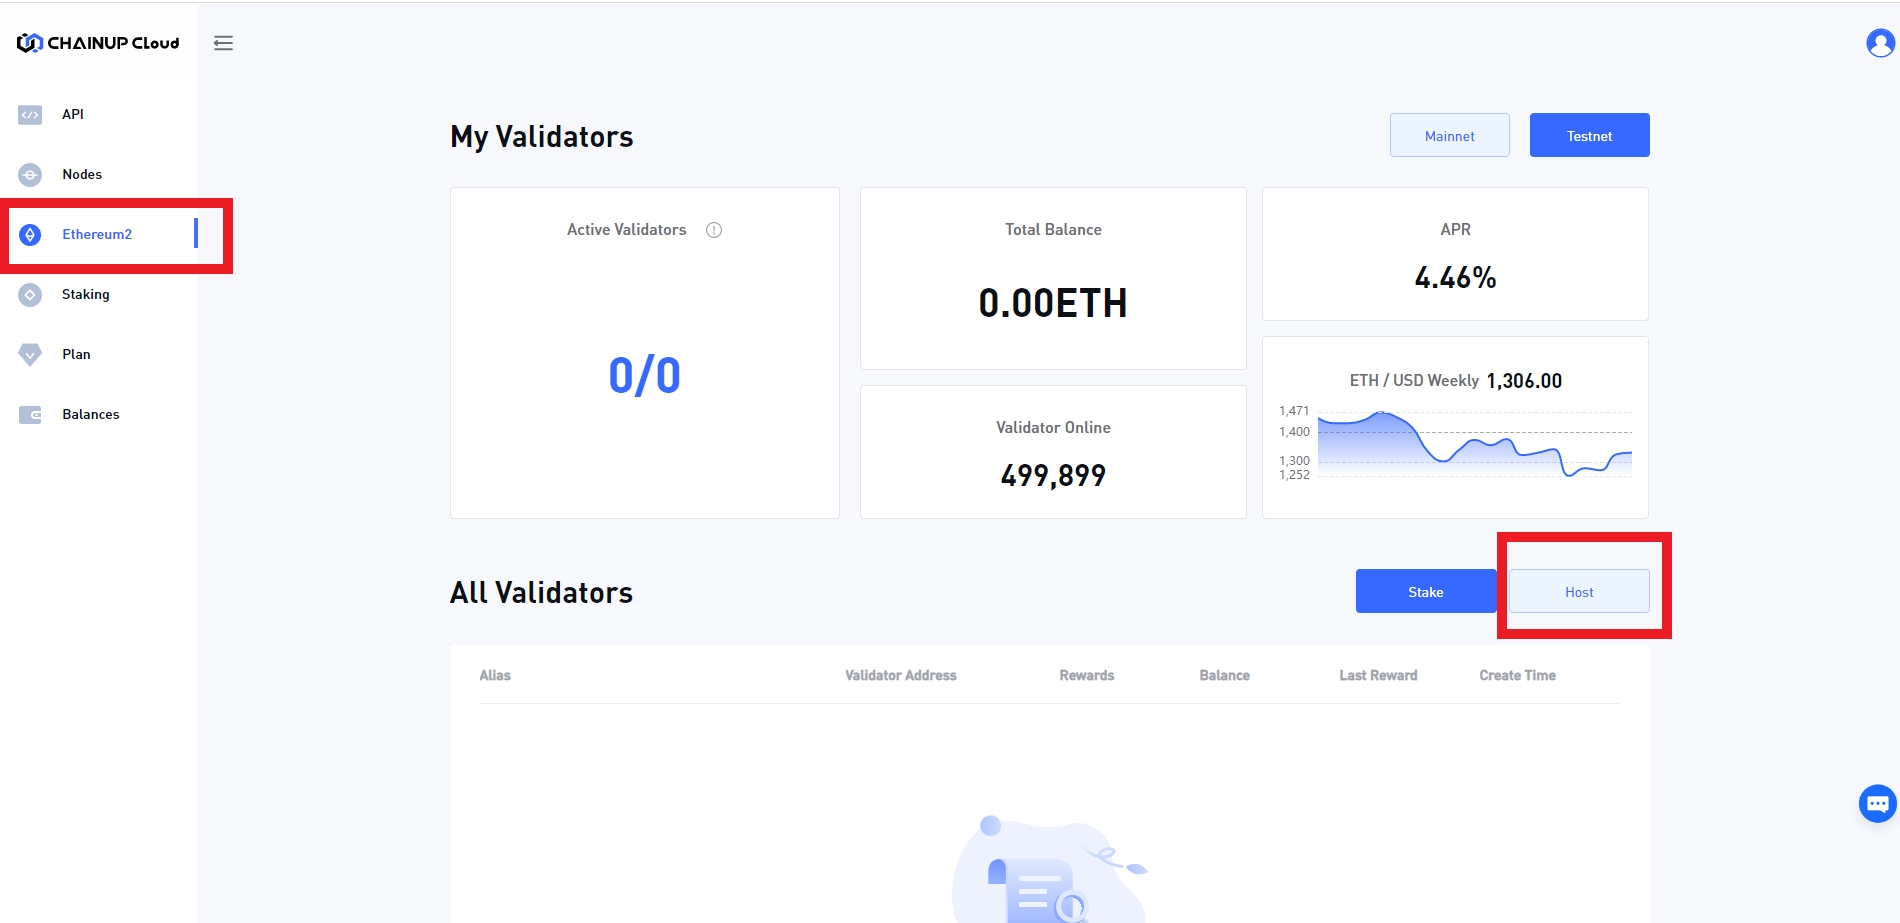
Step 1: Click on Ethereum 2 (sidebar). Make sure, you are in the Ethereum2 subpage, and click on the Host Button.
We assume users have already completed all the prerequisites prior to reaching this step
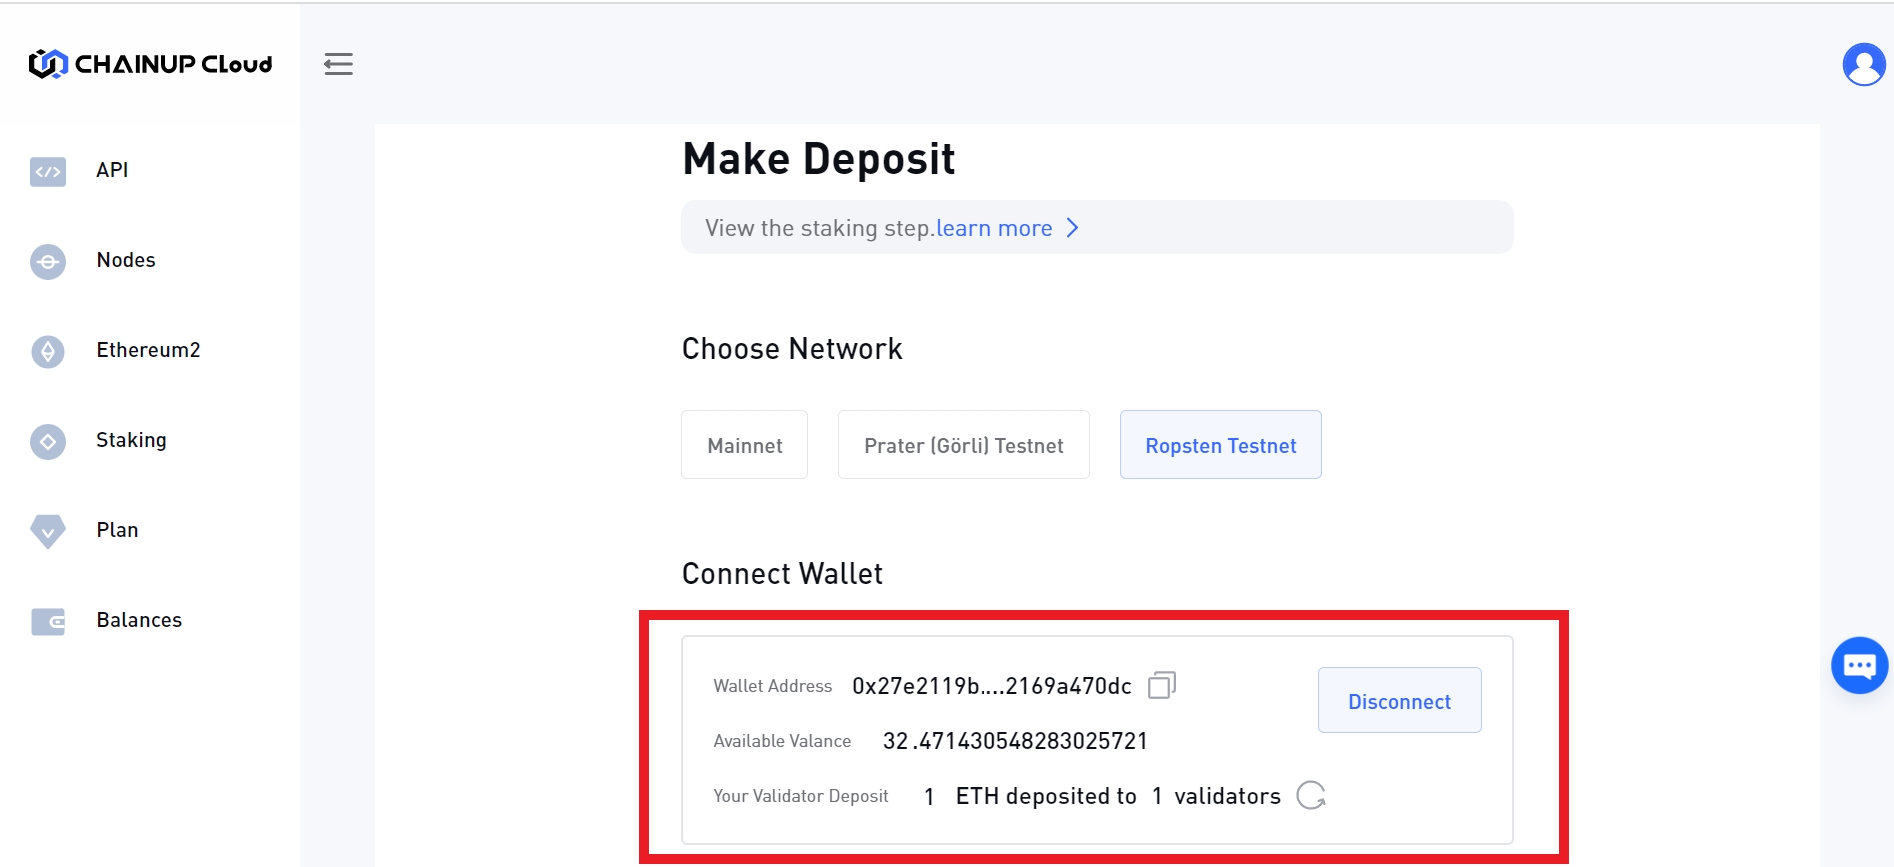
Step 2: Choose the network you are going to use and connect your Metamask wallet.
ChainUp Cloud is still providing support for the Ropsten Testnet. You can manually add the Ropsten network to your wallet with our Blockchain API.
Step 3: If you have deposited 32 Eth through the official staking launchpad or Abyss Eth2 Depositer (prerequisites b and c), the wallet details should be reflected on the dashboard.
Step 4: Create validator by checking Yes for the following two options.
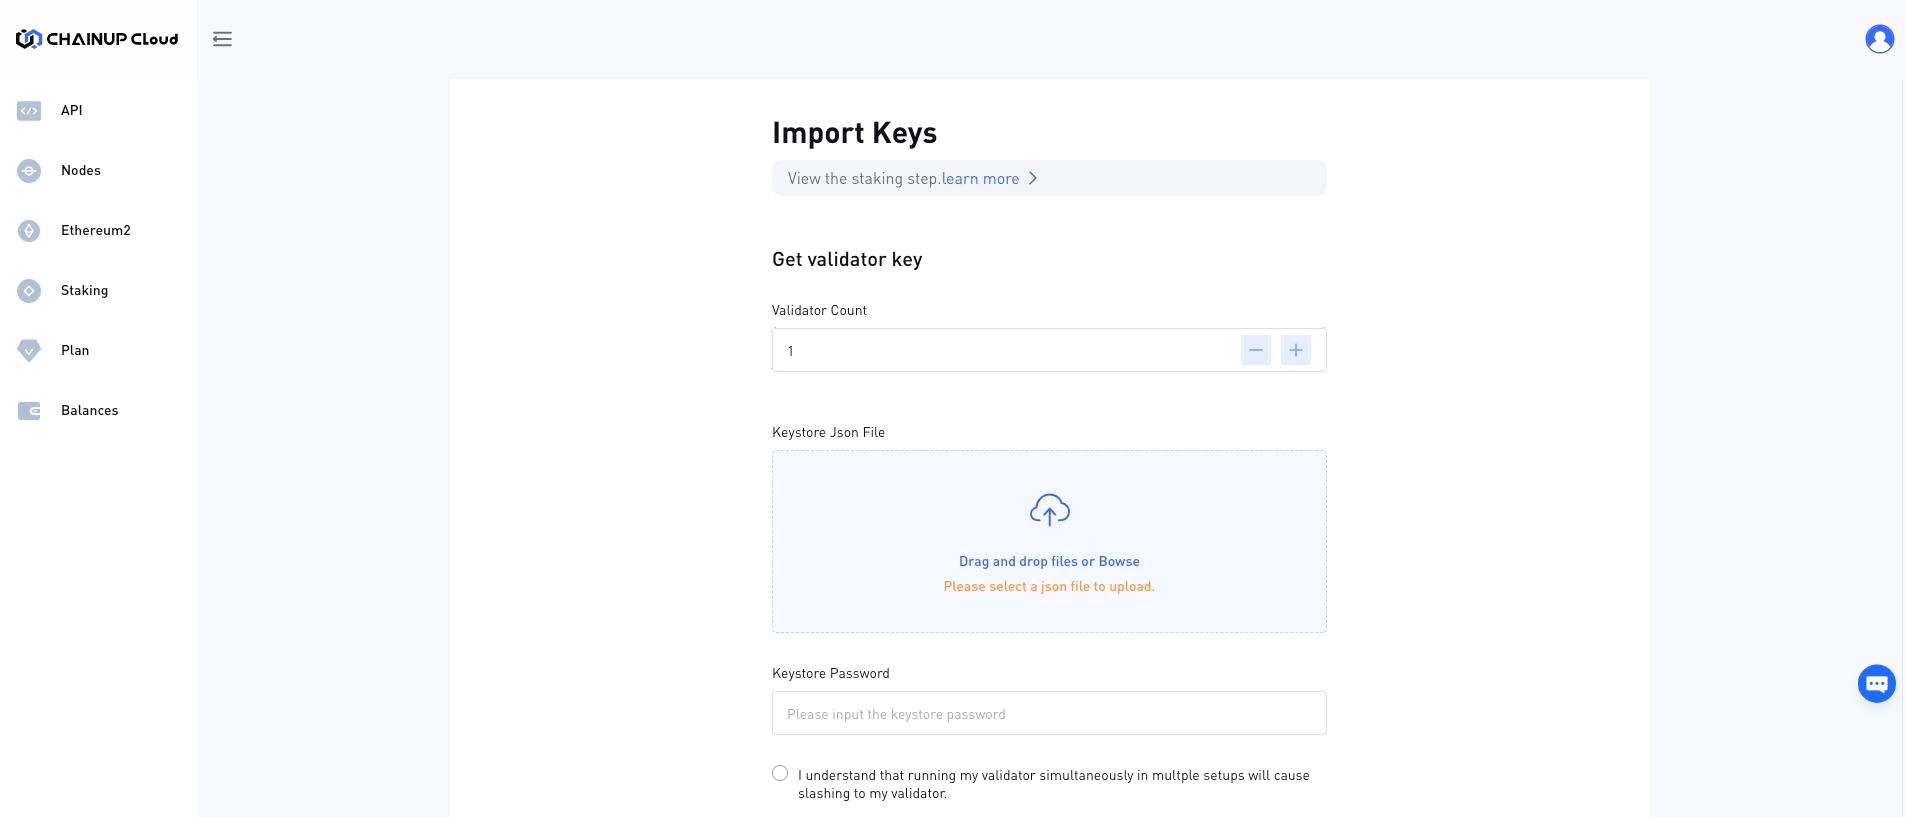
Step 5: Import the keys (keystore_timestamp.json) and password - this has been generated from the deposit-cli tool by following the video above.
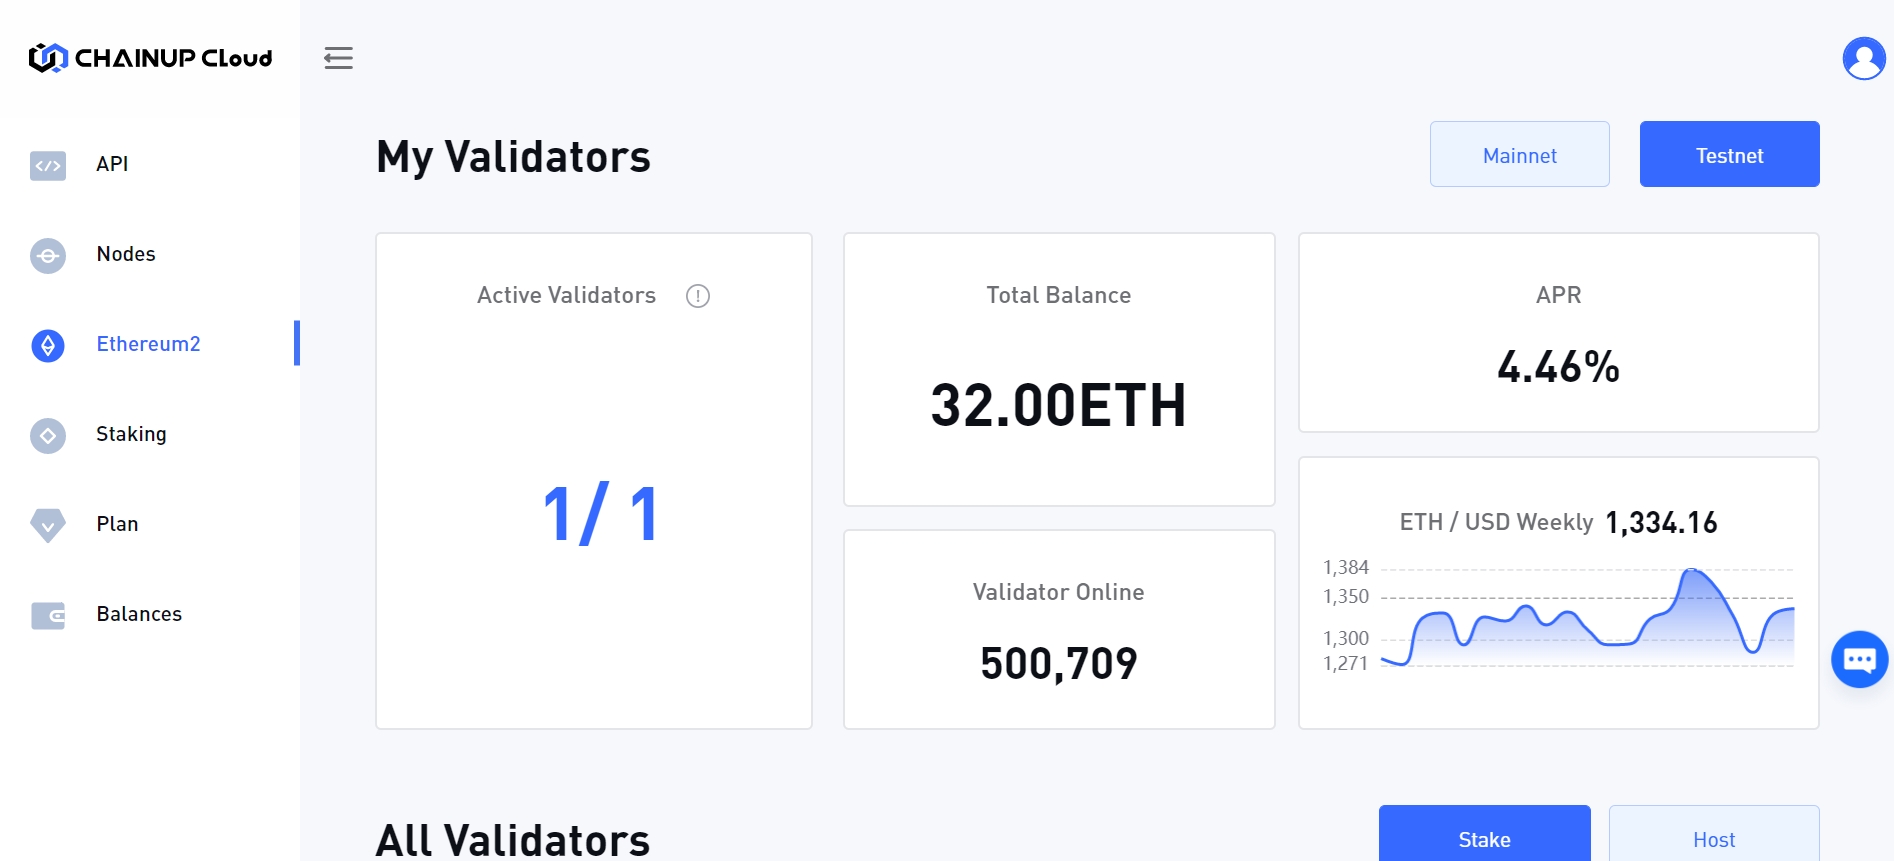
Step 6: Done and set! You can now click through the confirmation steps and validator should be active soon.
After the initial 32 Eth deposit, you may check back after some time or so, as it may take more than 12 hours for a transaction to reach the deposit contract on Beacon Chain.
Sign up now to start running your own validators and discover the wonders of ChainUp Cloud!